

Contents
When you face a ceiling leak, it’s essential to act quickly and methodically to minimize damage. Start by evaluating the situation; every moment counts. Are you prepared to tackle water damage cleanup effectively? From turning off electrical power to documenting the damage for insurance, each step plays an important role. You’ll need to know how to remove excess water and dry out affected areas properly. What comes next might surprise you.
Key Takeaways
- Document all damage with photos and notes to support insurance claims and track the extent of the leak’s impact.
- Turn off electrical power in the affected area to eliminate hazards and prevent electrical shocks during cleanup.
- Use wet vacuums and dehumidifiers to efficiently remove water and promote ventilation to prevent mold growth.
- Inspect and replace damaged materials, ensuring proper installation of moisture-resistant drywall and insulation for durability.
- Schedule regular inspections and maintenance of plumbing and roofing systems to catch potential leaks before they cause damage.
Assess the Damage Immediately
When you discover a ceiling leak, the first step is to assess the damage immediately.
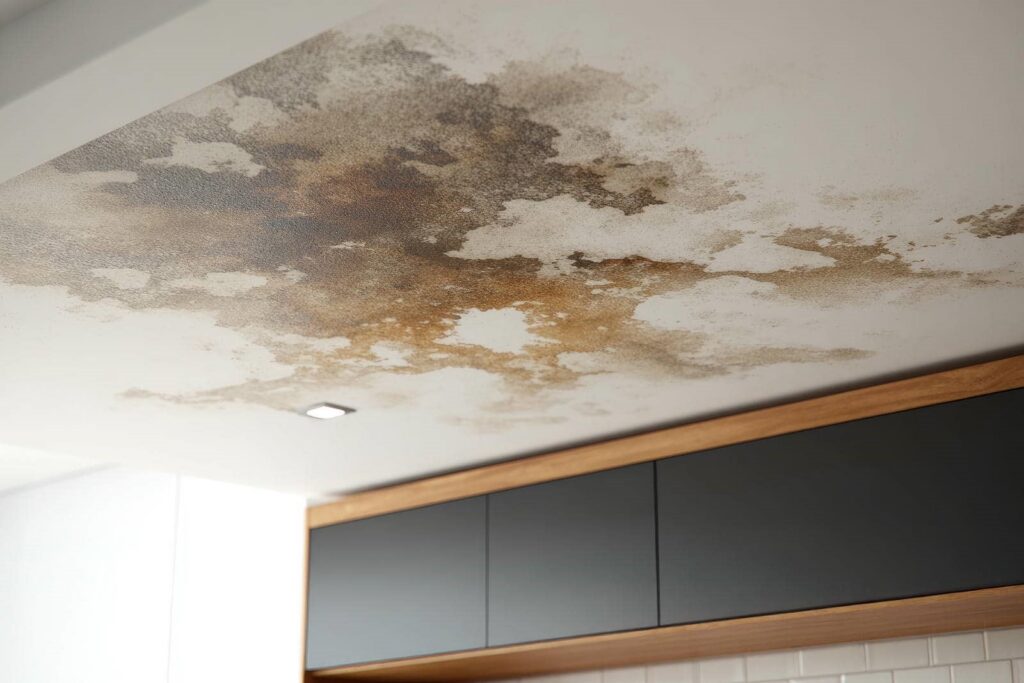
Start by observing the area directly affected; look for discoloration, sagging, or any signs of mold. Document your findings with photos to keep a record for insurance claims.
It’s essential to perform a thorough damage evaluation, as this will guide your next steps. Check the surrounding walls and floors for any moisture, as leaks can spread beyond the initial point.
Pay attention to the materials involved; drywall and insulation can absorb water and may need replacement. Your immediate response can prevent further issues, so act quickly.
If the leak is significant, consider contacting a professional to help assess the situation more extensively.
Turn Off Electrical Power
One of the first actions you should take after discovering a ceiling leak is to turn off the electrical power in the affected area. This vital step helps eliminate potential electrical hazards that can arise from water exposure.
Before you proceed, locate your circuit breaker panel, and identify the switch that controls the power to the room with the leak.
Turning off the power protects you from electric shock and safeguards your electrical equipment from damage. Remember, safety precautions are paramount during this process.
If you’re unsure which breaker to turn off, it’s wise to cut power to the entire house until you can assess the situation more thoroughly.
Once the power is off, you can focus on addressing the leak without the worry of electrical risks. Taking these steps helps ensure a safer, more effective cleanup experience for you and your home.
Document the Damage for Insurance
After ensuring the electrical power is off, it’s important to document the damage caused by the leak. This step is essential for a successful insurance claim and a thorough damage assessment. You want to provide evidence that accurately reflects the extent of the problem.
Take Photos: Capture clear images of all affected areas, including ceilings, walls, and furnishings.
Make Notes: Write down specific details about the damage, such as dates and how long the leak occurred.
List Damaged Items: Create an inventory of personal belongings affected by the water damage.
Remove Water and Moisture
To effectively remove water and moisture, you first need to assess the extent of the water accumulation in your space.
Once you’ve identified the areas affected, use the proper equipment, such as wet vacuums and dehumidifiers, to extract the water efficiently.
Finally, ensure good ventilation in the area to promote drying and prevent mold growth.
Assess Water Accumulation
How can you effectively assess water accumulation in your ceiling after a leak? Start by identifying the water source, as this is essential for leak detection.
Once you’ve pinpointed where the leak originated, check for water accumulation in the ceiling. Follow these steps to ensure a thorough assessment:
Visual Inspection: Look for discoloration, sagging, or stains—these are signs of trapped moisture.
Tactile Check: Gently press the ceiling surface; any soft spots indicate water damage.
Use a Moisture Meter: This tool can help quantify moisture levels, guiding your cleanup efforts.
Use Proper Equipment
Using the right equipment is essential for effectively removing water and moisture from your ceiling after a leak.
Start by gathering proper tools like a wet/dry vacuum, which can quickly suck up standing water. You’ll also need essential gear such as moisture meters to check hidden dampness and fans to promote drying.
Don’t forget to wear protective gear, including gloves and masks, to safeguard yourself from mold and contaminants.
If you’re dealing with extensive damage, consider renting dehumidifiers to expedite the drying process.
Remember, having the right equipment speeds up cleanup and helps prevent further issues down the line.
You’re not just cleaning; you’re safeguarding your home and ensuring a healthy environment for everyone.
Ensure Good Ventilation
As you tackle the aftermath of a ceiling leak, ensuring good ventilation is essential for effectively removing water and moisture.
Proper ventilation methods help in drying out the affected area and improve air quality, preventing mold growth and health issues.
Here are three effective strategies to enhance ventilation:
Open Windows and Doors: Create cross-ventilation by opening multiple openings to let fresh air circulate.
Use Fans: Position fans to direct airflow towards wet areas, speeding up the drying process.
Dehumidifiers: Employ these devices to extract excess moisture from the air, further protecting your home.
Dry Out Affected Areas
After you’ve removed standing water, it’s essential to focus on drying out the affected areas thoroughly.
Increase air circulation by opening windows and using fans to help evaporate any remaining moisture.
This step is important in preventing mold growth and further damage to your home.
Remove Standing Water
Remove standing water immediately to prevent further damage and mold growth. Effective water extraction is vital in addressing the aftermath of a ceiling leak. Here’s a quick guide to help you tackle this issue:
Assess the area: Identify the extent of the flooding and prioritize areas that need urgent attention.
Use the right tools: Invest in powerful pumps or wet vacuums for efficient water removal. They’re indispensable flooding solutions that can save your home.
Stay safe: Always wear protective gear, like gloves and boots, to safeguard yourself from contaminants.
Taking these steps ensures you act decisively, fostering a sense of community as you protect your space and loved ones from overwhelming water damage.
Increase Air Circulation
Increasing air circulation is essential for effectively drying out areas affected by water damage from a ceiling leak. You can implement several airflow techniques to expedite the drying process.
Start by opening windows and doors to create cross-ventilation; this encourages fresh air to flow through the space. Use fans strategically, positioning them to direct air toward the damp areas. Dehumidifiers are also invaluable; they help remove moisture from the air, enhancing circulation methods.
If possible, keep your ceiling fans running to push air upward and encourage evaporation. Be certain to monitor the humidity levels, aiming to lower them to prevent mold growth.
Inspect for Mold Growth
Since mold can develop quickly in damp environments, it’s essential to inspect your ceiling and surrounding areas for any signs of growth as soon as you’ve addressed the leak.
Mold can damage your home and impact your health and sense of belonging in your space. Here are three key areas to check:
Ceiling Surface: Look for discoloration, spots, or a musty smell that indicates mold presence.
Adjacent Walls: Examine the walls near the ceiling for peeling paint or stains, which can signal hidden mold.
Insulation and Attic Space: Check any insulation or hidden areas for moisture accumulation and mold growth.
Utilizing mold prevention techniques and mold testing methods can help you manage any issues effectively.
Staying proactive in this inspection protects your home and fosters a safe, welcoming environment for you and your loved ones.
Repair Structural Damage
Addressing structural damage promptly is essential to maintaining the integrity of your home after a ceiling leak.
Begin by evaluating the affected areas, focusing on load-bearing beams and joists. Any signs of warping, cracking, or sagging can indicate compromised structural integrity that needs immediate attention. If you notice significant damage, it’s wise to consult a structural engineer to evaluate the extent of the issue.
For minor damage, you may be able to repair it yourself. Reinforce weakened beams with additional supports or brackets as needed. Use appropriate materials that match your home’s original construction to ensure a seamless repair.
Don’t forget to check for any electrical or plumbing issues that may also be at risk due to the leak.
Replace Damaged Materials
Once you’ve repaired any structural damage, it’s vital to identify the areas affected by the leak.
Choose materials that match the existing ones for seamless integration and durability.
Finally, ensure proper installation to maintain the integrity of your ceiling and prevent future issues.
Identify Affected Areas
As you assess the damage from a ceiling leak, pinpointing the affected areas is essential for effective cleanup and restoration.
Begin with thorough leak detection and a detailed ceiling inspection to identify where the water has penetrated.
Focus on these critical areas:
Ceiling Panels: Check for sagging, discoloration, or stains; these often indicate water damage.
Insulation: Wet insulation can harbor mold, so look for dampness or a musty smell.
Electrical Wiring: Inspect for any exposed or damaged wiring, which can create safety hazards.
Choose Appropriate Materials
Choosing the right materials to replace damaged sections is essential for restoring your ceiling effectively.
Start with material selection; opt for moisture-resistant drywall, which can withstand future leaks.
Don’t overlook insulation types—fiberglass or foam board insulation can help prevent heat loss and moisture buildup.
Confirm the new materials are compatible with your existing structure to maintain integrity.
When selecting materials, consider your local climate and the specific conditions of your space.
This attention to detail ensures a long-lasting repair that fits seamlessly into your home.
Remember, the right materials enhance your ceiling’s appearance and contribute to a healthier living environment.
Your thoughtful choices will foster a sense of belonging and pride in your home.
Ensure Proper Installation
To ensure a successful repair, it’s crucial to install the replacement materials properly.
Using the right installation techniques ensures your ceiling looks great and stands the test of time.
Here are three key steps you should follow:
Measure Twice, Cut Once: Accurate measurements prevent costly mistakes and ensure a perfect fit for your new ceiling materials.
Secure Adequately: Use appropriate fasteners that match your ceiling type, ensuring everything stays in place and functions as it should.
Seal Properly: Apply sealants or weatherproofing where necessary to protect against future leaks and damage.
Prevent Future Leaks
While you may have dealt with a ceiling leak before, taking proactive measures can greatly reduce the chances of future leaks. Start with regular leak detection; inspect all plumbing and roofing systems at least twice a year. Look for signs of wear, such as cracks or stains, and address them promptly.
Implementing a routine of preventative maintenance is key. Confirm gutters and downspouts are clear to prevent overflow that could seep into your home. Seal any gaps around windows and doors to keep moisture at bay.
Consider investing in quality insulation and vapor barriers in attics and crawl spaces, as these can mitigate humidity levels that lead to leaks.
Finally, stay aware of any new construction in your area, as it could affect your home’s drainage. By being diligent, you create a safer environment and protect your living space from future water damage.
Consult With Professionals
Consulting with professionals is essential when dealing with ceiling leaks, especially if the damage appears extensive or you’re unsure about the source.
Hiring services can provide you with peace of mind and ensure the problem is addressed correctly. When you consult with experts, you’ll benefit from their experience and knowledge, which can save you time and money in the long run.
Here are three reasons to reflect on professional help:
Thorough Assessments: Experts can identify hidden issues that you might overlook, ensuring an all-encompassing solution.
Effective Remediation: Professionals use advanced techniques and equipment, assuring that the water damage is fully addressed and preventing future leaks.
Safety Assurance: Consulting experts minimizes risks associated with mold and structural damage, protecting your home and loved ones.
Don’t hesitate to reach out to professionals; their expertise can make all the difference in your cleanup efforts.
Frequently Asked Questions
How Can I Tell if My Ceiling Is Structurally Safe After a Leak?
To assess your ceiling’s structural integrity, conduct a thorough ceiling inspection. Look for sagging, cracks, or soft spots. If you notice any issues, consult a professional to ensure your ceiling’s safety and stability.
What Are the Signs of Hidden Water Damage in Ceilings?
You’ll notice signs of hidden water damage if you see stained drywall, peeling paint, or sagging ceilings. These issues often signal deeper problems that need immediate attention before they spiral out of control.
How Long Does It Take for Mold to Develop After Water Exposure?
Mold growth can start within 24 to 48 hours after water exposure. To prevent it, make certain you dry affected areas promptly and monitor for any signs of mold. Staying vigilant protects your home and health.
Can I Use Fans to Dry My Ceiling After a Leak?
Yes, you can use fans to dry your ceiling after a leak. Focus on fan placement for ideal airflow, and combine drying techniques, like dehumidifiers, for effective moisture removal and preventing mold growth.
What Are the Health Risks Associated With Ceiling Water Damage?
Ceiling water damage can release a mold invasion that threatens your health! Mold exposure can compromise air quality, leading to respiratory issues and allergies. Act quickly to protect your space and ensure a safe home environment.
Conclusion
By following these ten tips, you can effectively tackle ceiling leak water damage and restore your home. While it might seem tempting to handle everything yourself, remember that some situations can be complex and require professional insight to ensure thorough remediation. Investing in expert help saves you time and safeguards your property from future issues. Don’t underestimate the importance of addressing water damage promptly—it’s essential for the health of your home and your peace of mind.